Showing posts with label Stamp-a-ma-jig. Show all posts

Monday, May 19, 2014

Bugs and Kisses-HSSCC#185

Happy Victoria Day if you are a Canadian!  Today is a holiday, and so in honor of that, and in light of the fact that I am soooo nursing a ginormous head cold at the moment... I am gonna be super quick!  I had a teeny chance to play in my craft room this weekend and I played along at Hand Stamped Sentiments!  It's been such a long while since I played along at any challenge... I had a hard time getting going!  All this beautiful weather has not allowed me much time to "play"!  But I don't want to complain about the gorgeous weather either, so....

Here's my card for Hand Stamped Sentiments cool and fun color challenge!


Love this set from SU! for all my little itty bitty nieces and nephews birthdays... it's long retired, but I never let that worry me!


There's the colours the challenge called for... aren't they just so fun?  Love' em!  OK, I'll be back in a sec with one more card!

xo Anita

Wednesday, April 23, 2014

CMCC#17-Happy Birthday

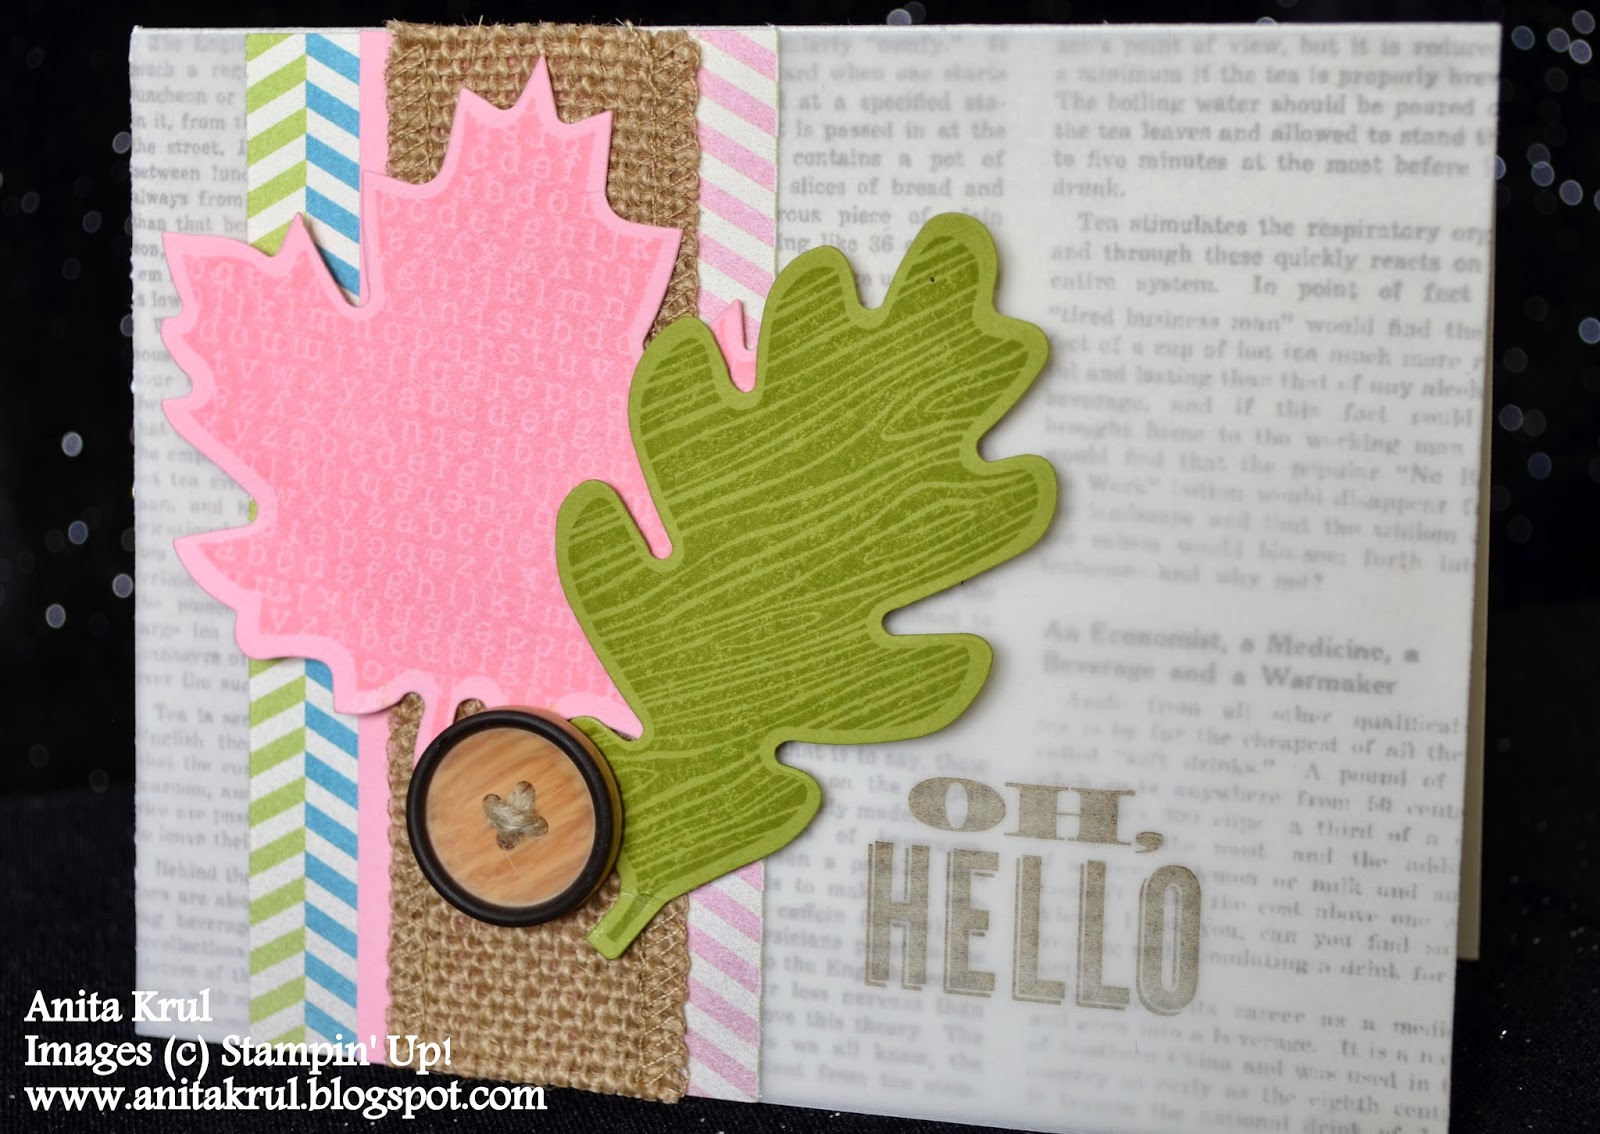
Good morning everybody!  Hopefully your week is going great!  Ours is an exciting one... my husband's 'baby' sister is getting married at the end of it, so those plans are pretty much taking over our lives at the moment!  I'll be grateful when it's all over and we can breathe again!  But in the meantime it is actually pretty exciting!  This is our last sibling to get married, and pretty much the only wedding that my daughters will really remember, so we're trying to make sure it gets enjoyed as much as possible!  And by that I mean new EVERYTHING, hair appointments, limo rides... the works!)  Which reminds me... I have to make them a card still... and for that matter figure out what gift they'll get!  Oops!

But in the meantime, the girls and I at Colour Me...! have another challenge for you!  This one is so much fun!  I just love these colours!  I can't wait to see what you all come up with!


Here's what I came up with!


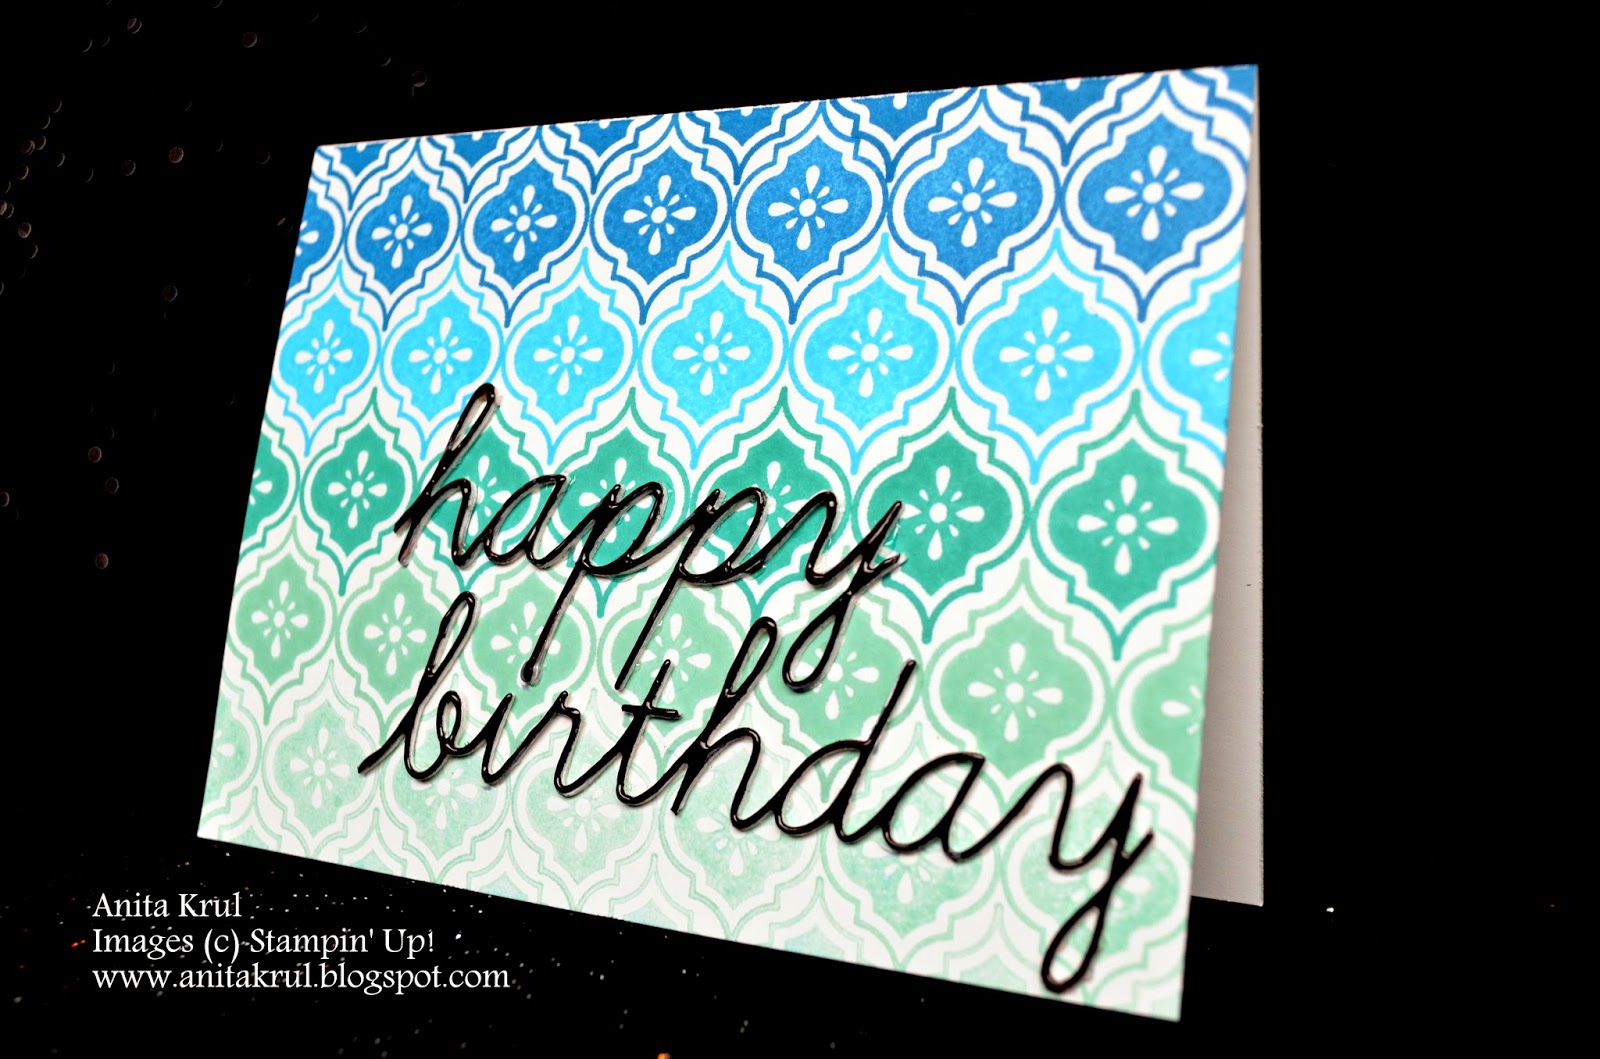
I used my Mosaic Madness stamp set and my SAMJ (obviously!) I could never have managed to do all that lining up with goofing up somewhere along the line!  So this is what I did... the top row, which is partly off the card, I double stamped with Pacific Point.  The next row I just stamped regular, which resulted in a little less intense colour.  Then Tempting Turquoise, Bermuda Bay, and Coastal Cabana.  The next row I stamped Coastal Cabana off once before stamping on the card, and the very last row, which is partly off the card and so light you can barely see it on here, I stamped off twice before stamping on the card!  I'm pretty happy with the way it turned out... I should be, I took forever doing it, making sure I would not goof up!!!  The die cut is from Memory Box... the Happy Birthday Tidings... I just cut all the little leaves and flowers and birds off to get just the words.  I stacked five of them on top of each other, coloured the top one black, used my clear Wink of Stella pen, and topped that with a coat of Glossy Accents!  I just love the shiny, wet look that resulted!

OK, click over to the Colour Me...! challenge blog to check out all the details and other FABULOUS cards from the other design team members!  I can hardly believe my time as Featured Designer is almost up... I'm so glad there are 5 weeks for April!  Yay!

Monday, March 17, 2014

Gift For Baby - VLVMAR2014


I decided to play along with the Viva La Verve challenges.  I actually don't have any Verve stamps, but they're not snobby about that, so... I had some fun!  And who knows, I could be the winner of the $100 Verve voucher!  I love their sentiment stamps so much!  And  I love a challenge to get the creative ideas flowing too.  The first week of March has a sketch and colour challenge, and although it isn't necessary to combine them, I did.


Here's my card for week #1.


My Labels Framelits unfortunately don't nest that closely together, so I just cut around my white one by hand!  It turned out pretty good though.  The colour combo of Pool Party, Gumball Green and Baked Brown Sugar was perfect for a baby boy card, and there are a few ladies on our church who are expecting babies in the next couple months, so I'm sure to need one soon!

Thanks for looking!

xo Anita

Many Thanks! CQC#232, FabFri37

I played along with the challenges at ColourQ and FabFriday today!  I loved the sketch at FabFriday, it was different... and different is good!  And the colours at Colour Q were a challenge to say the least.... not because of the combo, but rather because I had about 6 square inches of Lucky Limeade left!  I very carefully fit my Word Bubbles Framelits on it, and then used my SAMJ to stamp on them!  Perfect!


You may be wondering where I got that small framelit on the bottom right, well, it's really the same as the one above it, I just ran it through twice to make it a bit shorter!  Finicky... but it worked!


Well... I would say that was a great use of the very last little bit of my Lucky Limeade.... lucky indeed, wouldn't you say!

See you soon for another card!

xo Anita

Friday, February 28, 2014

Oh, Hello!

Happy Friday!  We're beginning day two of our long weekend already!  Today is the day that I will get into my stamp room!  But first, I'll quickly show you a card I made!

This one is very pretty, isn't it?


It's pretty self explanatory, so I won't bore you with any chit chat!  What a nice soft, spring-y card this would be to send to someone 'just because', don't you think?

I am blogging and designing over at mydigitalstudio.net today.... click on over to see some more spring-y inspiration!  Leave me some love!

Have a fabulous weekend!  Hope you get some crafting time in!  

xo Anita

Thursday, January 2, 2014

A Wish For Peace - Merry Monday #88, CMCC#1

Hello again!  I found a new challenge blog yesterday, co-founded by the fantastic Hayley Kew and Tara Bourgoin.  It's a colour challenge, and sounds like it's going to be so much fun every week!  I hope to play along as often as possible!  Go check it out here... Colour Me...!  I combined their first colour challenge with the one at Merry Monday, which was to use an animal on your Christmas card!  I know it's juuuust past Christmas... but I may as well get a head start on this years, right?


I used my VERY ancient but one of my favourite Christmas sets A Wish For Peace.  I think the dove is beautiful and a real symbol of what Christmas is all about.  I stamped my images in Island Indigo, then using my SAMJ I stamped directly over it with Versamark, sprinkled my Heat and Stick Powder, then sprinkled and heat set my Dazzling Diamonds glitter.


It's soooo hard to catch the shimmer and shine in the photo... but with the last two photos you can hopefully get an idea!


 I was putting off taking these pictures because it is soooo dark outside today, but these will have to do!  Sorry!  It's been mostly very dark and dusky out there, so it won't get any better than this!

I had glitter absolutely everywhere, but see.... that's the thing I love about challenges... they seriously make you do stuff you wouldn't normally do (in a good way!)  I don't think I've used glitter more than a handful of times in the last five years!  It was in and on EVERYTHING!  My girls have this book on CD from the library all about this young girl who goes to a birthday party held at 'Glitterati', and that is the only work I could think of to describe my desk (and me!) when I was done!

xo Anita

Monday, October 28, 2013

Look Who's Turning... 3! FabFri29, FM133


Hello again!

Second post for the day... it has to be quick.  My little lady will wake up from her nap any minute!  I played along with FabFriday and the Friday Mashup.  


I turned the sketch on it's side and mashed it up as well using the challenge colours AND cake!  Cupcakes are little cakes aren't they!   Yum, yum!  This card will be for my baby who will hopefully celebrate her 3rd birthday in just a couple weeks!  Boo hoo!

Here's my card!


This is such a fun and colourful card!  I never would have used gray tones on a cupcake... but it works!  I trimmed my chevron ribbons in half and frayed them a little.  I squeezed some Basic Gray sprinkles on the middle cupcake... that was about the best I could do for that colour!

Three cupcakes, three candles... three years old!

Seeya later.

xo Anita

Thursday, October 17, 2013

Merry Christmas - PP#167, Merry Monday #79


Hi there!  It's a beautiful day here in the Fraser Valley... no time to be thinking about Christmas yet.... but I went ahead and made a Christmas card anyway!  I used the Merry Monday and Paper Players challenges to inspire me... and the end result is sure shiny and sparkly!

I used the emboss resist technique on here.  I heat embossed my tree in white, sponged some Midnight Muse and Pool Party behind, wiping the excess off of my embossing when I was done.  I also stamped some falling snowflakes in Pool Party, finishing off with my Midnight Muse sentiment and some Dazzling Diamonds to give my tree some sparkle!  


On my second photo you can see the Dazzling Diamonds a little better than in the first... but it's pretty hard to see.  It's there though... and in real it's just gorgeous!

OK... that's it for me.  Have a wonderful day!

xo Anita

Sunday, October 13, 2013

FabFri28, FMS 107


Good morning to you all!  I managed to squeeze some card making in on Saturday, and I decided to play along with a nice simple sketch at Freshly Made Sketches using the FUN colour combo at Fab Friday!  Be sure to check out both sites... they've always got great challenges going!


I wanted to make a card for my aunt and uncle who just celebrated their 50th wedding anniversary!  I decided to make them one to go along with this gorgeous autumn season.  Now, I realize you don't exactly see Rich Razzleberry leaves laying around on the ground.... but you know... we have a couple trees in our backyard, and those leaves are so vibrantly red, they LOOK HOT PINK!  Seriously!  So, you see... I can have Rich Razzleberry leaves if I like!  And I like!

Here's my card!  It turned out great if I do say so myself!  And I got a "wow" from my husband who usually says they look good... when he hasn't even looked!


You may be wondering where my Basic Black is... I just couldn't seem to get it in there without making this card look Halloween-ish... so I stamped my sentiment in it for an easy fix!  For the tiny Tangerine Tango scallop, I cut a scalloped ribbon in half and peeked it out from behind my natural cotton, on which I frayed the edges. (love doing that!)  I loved this sketch too... I'll definitely be using it in the future as well!  

Leave me a comment letting me know what you think about my card!  I love hearing from you!  Seeyou later.

xo Anita

Friday, August 2, 2013

Happy Birthday!


Good morning stampers!  Today's card features the Botanical Blooms set and the colour combo of Marina Mist, River Rock, Tangerine Tango and Cajun Craze!  It may seem like an odd combo, but the flowers look great stamped in Tangerine and Cajun.  The Marina Mist looks pretty bright on here, so my picture is probably off a little, but it looks stunning in real life!  This is one of those very simple, fast cards you can whip up when you suddenly need one in a pinch! 


Thanks for looking!  Have a great weekend!

Tuesday, June 18, 2013

FM114, CCMC256


Today's card features a new-to-me technique.  The brick wall!  I've seen this technique before, but never really felt like trying it... too lazy I guess!  I was spurred on to try it at The Friday Mashup!  Their challenge this week was a sketch or the brick wall technique... or a mashup of both!  I went with the colour challenge at Create With Connie and Mary.  It's really beautiful!


I chose to mashup my challenge and do the sketch along with the brick wall technique.  It turned out perfectly using my CCMC colour combo as well.


Since I don't know yet what I will be using this card for, I went with no sentiment, instead opting to use a row of pearls.  I stamped my main image on First Edition DSP, and after cutting my 'bricks', I sponged them all with Early Espresso ink, mounted them on Very Vanilla, which I adhered to some Island Indigo DSP for a tiny border, and then finally adhered to Early Espresso CS.  I used my Dotted Scallop Ribbon Border Punch for a tiny peek of Island Indigo at the bottom.  Using my Early Espresso and Summer Starfruit markers to colour my image was a cinch and couldn't have worked out any nicer.  I love the look of it stamped on the First Edition.

Thanks for taking the time to look!  Leave me a comment.... I read and appreciate each and every one of them!  Have a great day!

Tuesday, June 11, 2013

Friday Mashup... On Tuesday!

I really wanted to play along with the Friday Mashup this week.  I've been meaning to do something with hexagons, but my crafting time is pretty short these days, so I quickly sat down this morning and created this fun card, while my youngest was napping.  I CASEd the layout from Ilina Crouse, a fellow demo.  I wanted to include those hexagons, and make it girly, so I changed it up a little to suit my needs, and it worked out perfectly.

Here's the challenge from Erica over on the Friday Mashup....

  1. Create a project using "Hexagons".
  2. Create a "Girly project".
  3. Or Mash it Up and create a "Girly project using Hexagons".


Here's the card I made...


I used Rose Red, Wild Wasabi, and Bashful Blue for this card.  I got my colour combo off of my Colour Coach (the retired one)  I embossed the background DSP after adhering them together.  They definitely get a little 'distressed' looking after you run them through the embossing folder.  I like it though!  I used my SAMJ to get the clouds and strings and streamers 'just right'.  The button with the twine bow is the finishing touch.  My niece will be getting this card in the mail.  She's turning 15 in a couple weeks!  I can't believe it.

Thanks for looking!  Don't forget to click on over to the Friday Mashup blog, check out what everyone has made, and maybe even play along yourself!

Bunch of Baby Cards

This card was a CASE from my upline Carrie Gaskin.  I loved it so much when I was done, I made it in a few more colours for my sister who had ordered a bunch of baby cards.  A little labour intensive and definitely not CAS, but a beautiful card worth the work, when all is said and done.


These cards are again made with all SU! products except for the odd button or ribbon!  And depending on the post office... those buttons or pearls may make them non-mailable!

Saturday, June 8, 2013

3 Card Set

These have got to be the cutest little cards in the West.  The finished size is... I cannot remember!  Maybe 3x4 or so?  Making a little set of cards like this is a great way to use up little pieces and strips of leftover paper.

For the first one I used the Cheep Talk stamp set and my SAMJ to get the perfect placement of flowers on those branches.


This one below uses the Bugs and Kisses stamp set.  Used the SAMJ on this one too.


And for the third one I used the Cheep Talk set again.  And the SAMJ!


For all three cards I used a base of Bermuda Bay which was one of the In Colours then, and is now back in the SU! Brights collection!  Love it!

Saturday, May 11, 2013

From Me To You


 This is a really fun card to make.  I used the (VERY old) So Many Sayings stamp set, which I had carefully cut all the sayings apart on, and had my husband cut the wood blocks into separate strips as well, and, the Good Neighbour stamp set from Sale-a-bration a few years ago!  A little sponging for the grass and the sky and you're good to go!